Crafting the Perfect Cannagar: A DIY Step-by-Step Guide

Purple Rose Supply . Follow
5 months ago
Introduction
Cannagars, the luxurious cousins of cigars, have gained immense popularity among cannabis enthusiasts for their smooth burn and potent experience.
Crafting your own cannagar can be a rewarding and cost-effective way to enjoy this indulgence. In this step-by-step guide, we’ll walk you through the process of creating your very own cannagar masterpiece.
Materials Needed
Cannabis Flower
Select high-quality cannabis flower of your choice. Opt for strains with dense buds and optimal moisture content for better rolling.
Cannabis Concentrate
Choose a cannabis concentrate, such as hash oil or distillate, to bind the flower together and enhance potency.
Cannabis Leaves
Gather cannabis leaves to use as wrappers for your cannagar. Ensure the leaves are pliable and free of any mold or pests.
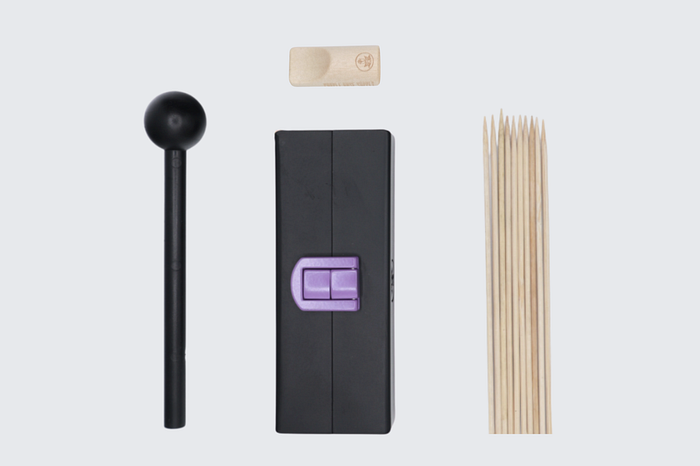
Rolling Equipment
You’ll need skewers, a mold (optional), a brush for applying the concentrate, and a heat source for curing.
Step-by-Step Guide
Step 1: Prepare Your Materials
Grind the cannabis flower to a fine consistency and set it aside. Warm the cannabis concentrate to make it easier to apply.
Step 2: Prepare the Wrapper
Remove the stems from the cannabis leaves and flatten them gently with your fingers. Ensure the leaves are pliable enough to wrap around the flower.
Step 3: Apply the Cannabis Concentrate
Using a brush or your fingers, evenly coat the inside of the wrapper with the warmed cannabis concentrate. This will act as the adhesive for your cannagar.
Step 4: Pack the Flower
Evenly distribute the ground cannabis flower along the length of the wrapper. Ensure there are no air pockets and pack the flower tightly to promote an even burn.
Step 5: Roll the Cannagar
Carefully roll the wrapper around the packed flower, applying gentle pressure to ensure a tight seal. Use a skewer to poke holes along the length of the cannagar to allow for proper airflow.
Step 6: Cure the Cannagar
Place the rolled cannagar in a mold (if available) to help it maintain its shape. Alternatively, wrap it tightly in plastic wrap. Allow the cannagar to cure in a cool, dark place for at least 24–48 hours.
Conclusion
Crafting your own cannagar allows you to customize the experience to suit your preferences. Experiment with different strains, concentrates, and rolling techniques to find the perfect combination for your palate.
With practice and patience, you’ll soon be rolling cannagars worthy of envy at any smoke session. Enjoy responsibly and happy crafting!
Recommended topics
Recommended from Guest Post

eximtradedata